Photographing the Night Sky at Home
Astrophotography has come a long way in recent years. For millennia, we have been in awe of our night sky and as far back as we know, human beings have been using the stars above for navigation and they have been important spiritually and religiously. In the past few decades, technology has allowed us to see the stars in ways our ancestors never thought possible. More recently, advancements in digital photography allow us at home to capture incredible images of the night sky, including our galaxy, meteor showers and even the surface of the sun.
Now, photographing distant stars isn’t just the work of astronomers. Anyone can pick up a camera, even a smartphone and capture beautiful images from the comfort of their own home. All you need is your camera or phone, a dark night, and the willingness to try.
Here’s how you can try your hand at Astrophotography at home.
Getting Set Up
Ideally, find yourself a digital camera. A compact Digital SLR would be best because they have a range of settings that will help you optimise your shots.
Set your camera to manual mode and disable autofocus. This way you have full control over your lens and your shutter, to help you capture some incredible images.
The three key settings that you should focus on are:
Aperture
The aperture is the amount of light the lens of your camera allows when you release the shutter. On most cameras, the Aperture is measured by an F/stop, with figures such as F/16, F/11, F8, F/5.6, F/4, F2.8, F/2 and F/1.4
The lower the f/stop, the more light will be allowed through your lens. So the lower the number, the longer the exposure. You can experiment with your aperture to get a feel for how an increase or a decrease in exposure affects your images.
Exposure Time/Shutter Speed
The exposure time is how long your camera’s shutter remains open when your press the button to take photographs. This is measured in fractions of a second. The longer your shutter remains open, the greater the exposure of the image. In low light conditions, a longer shutter speed will allow for a better image, but make sure your camera is stable or you use a sturdy tripod.
Longer exposures of 25 seconds or more will begin to show star trails and capture the movement of a star as it travels across the sky. Experimenting with shutter speeds
ISO
ISO stands for International Standards Organisation. The ISO determines the sensitivity of the image sensor and tells your camera how much light it needs to capture to create an image.
Generally, you should experiment with using higher ISO numbers, as they make your camera more sensitive allowing you to capture darker objects, although they do result in grainier images.
Timing it right
A good tip is to take pictures early in the morning, just before dawn, because light pollution levels are at their lowest. Find the darkest patch of the night sky you can. Travelling out into the countryside is best, away from the bright lights of big cities.
The Milky Way
Capturing images of the Moon can be incredibly satisfying. It is of course a large target above us that we can see in various stages of the Lunar Calendar. When photographing more distant objects in our solar system, sunlight reflected from the surface of the moon can have an impact on our ability to capture the perfect shot. Avoid full moons to capture starlight in all its glory.
Thinking about Composition
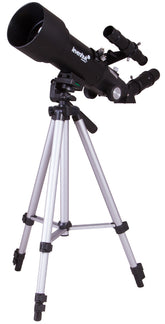
Buying a tripod isn't essential, but it will allow you to frame your shot and keep the camera steady if you are taking a picture with a very long exposure.
Choosing an interesting foreground can enhance your images of space.
Trees or buildings silhouetted against a backdrop of swirling stars look stunning and having some light sources on the ground can complement the pinpricks of stars in the sky.
Using a wide-angle or fisheye lens will mean you can get more into your picture. When using a larger lens, playing around with your aperture and ISO will help you to dial in your settings and get the perfect shot of the night sky.
In recent years a kind of friendly international competition between Astro photographers who specialise in combining extraordinary terrestrial foregrounds with celestial backdrops has arisen. Sharing our images on social media has made it much easier to show our astrophotography to the world. Long exposures of our night sky are hugely popular on Tik Tok and Instagram, creating real user engagement.
Photo Editing and Software
Photo editing software can help you extract the best from your efforts in the field. Taking a raw image and boosting the exposure can change the feel of the image and adding tints and changing tones and hues will also overlay new colours onto the bright white pinpricks of stars.
Experimenting and having fun is the best way to come up with something that captures the magic of the sky overhead.
Using a high ISO setting can sometimes create 'noise' in a photograph, or extra coloured pixels. Many editing suites will let you mitigate this with a noise-reduction feature.
Free editing software to get you started includes Fotor and PhotoScape.
For more serious Photo Editors out there, you can subscribe to Adobe Lightroom, which includes a host of professional tools and the option to create pre-sets for €12.49 per month.
Share your astrophotography with us on Facebook
